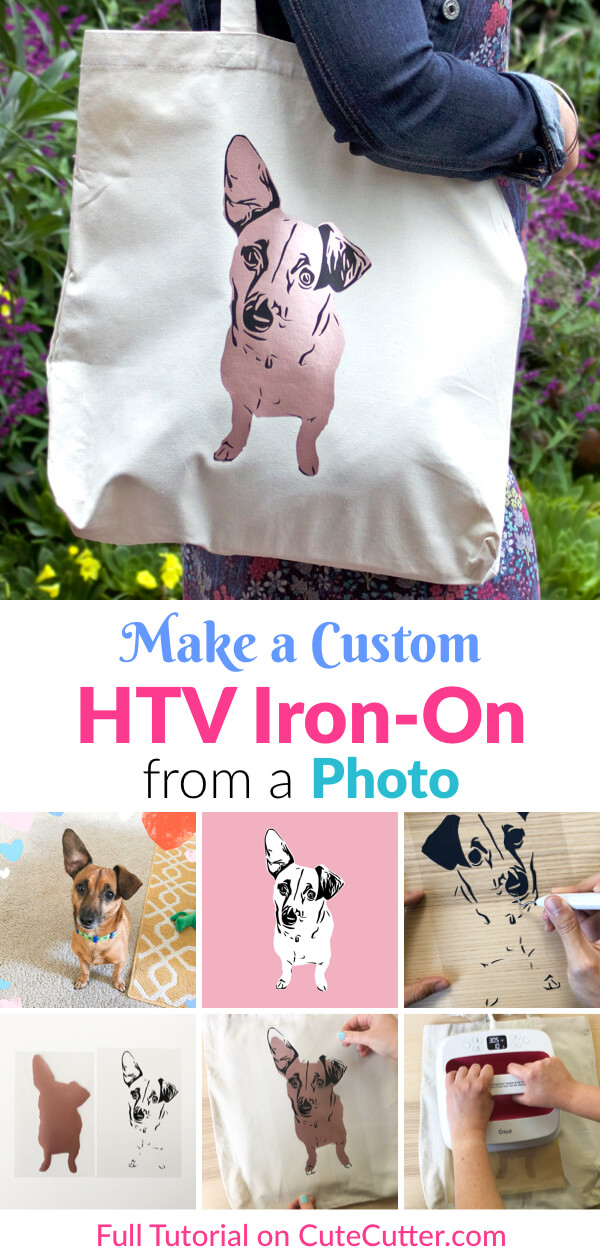
How to Make a Custom HTV Iron-On from a Photo
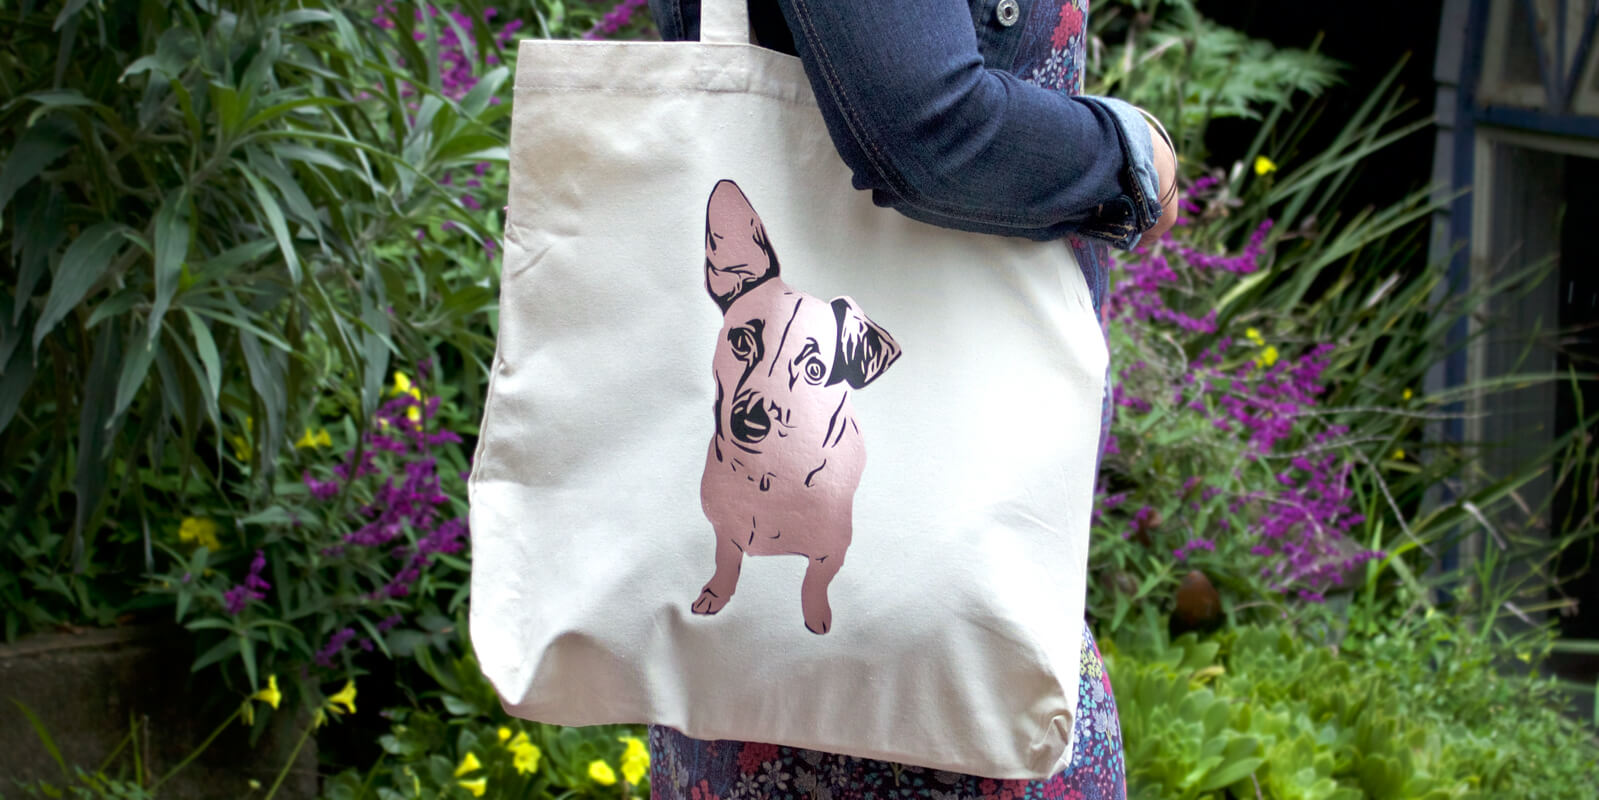
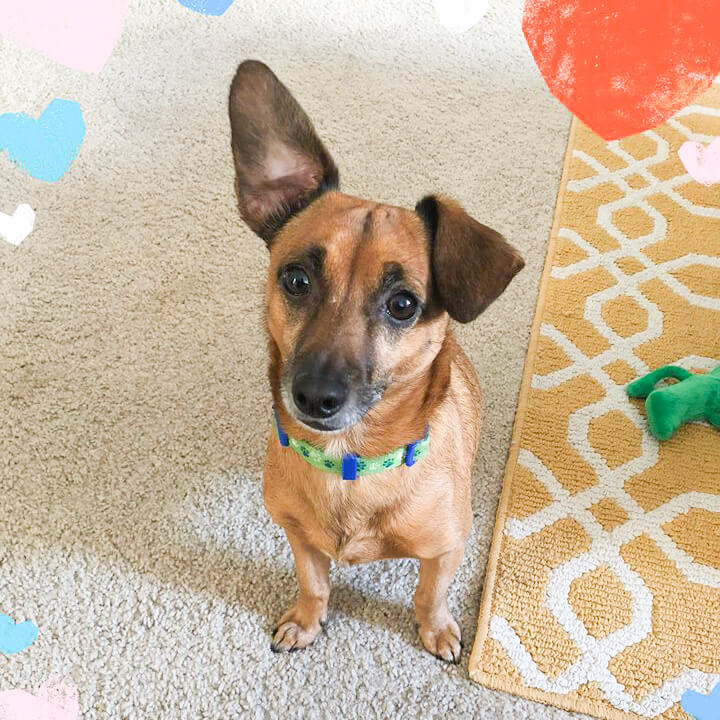
We made this custom tote bag as a birthday gift for our friend, Gretchen, using a photo of her dog, Alfred.
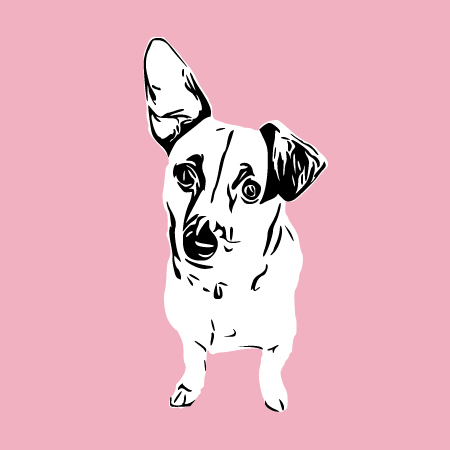
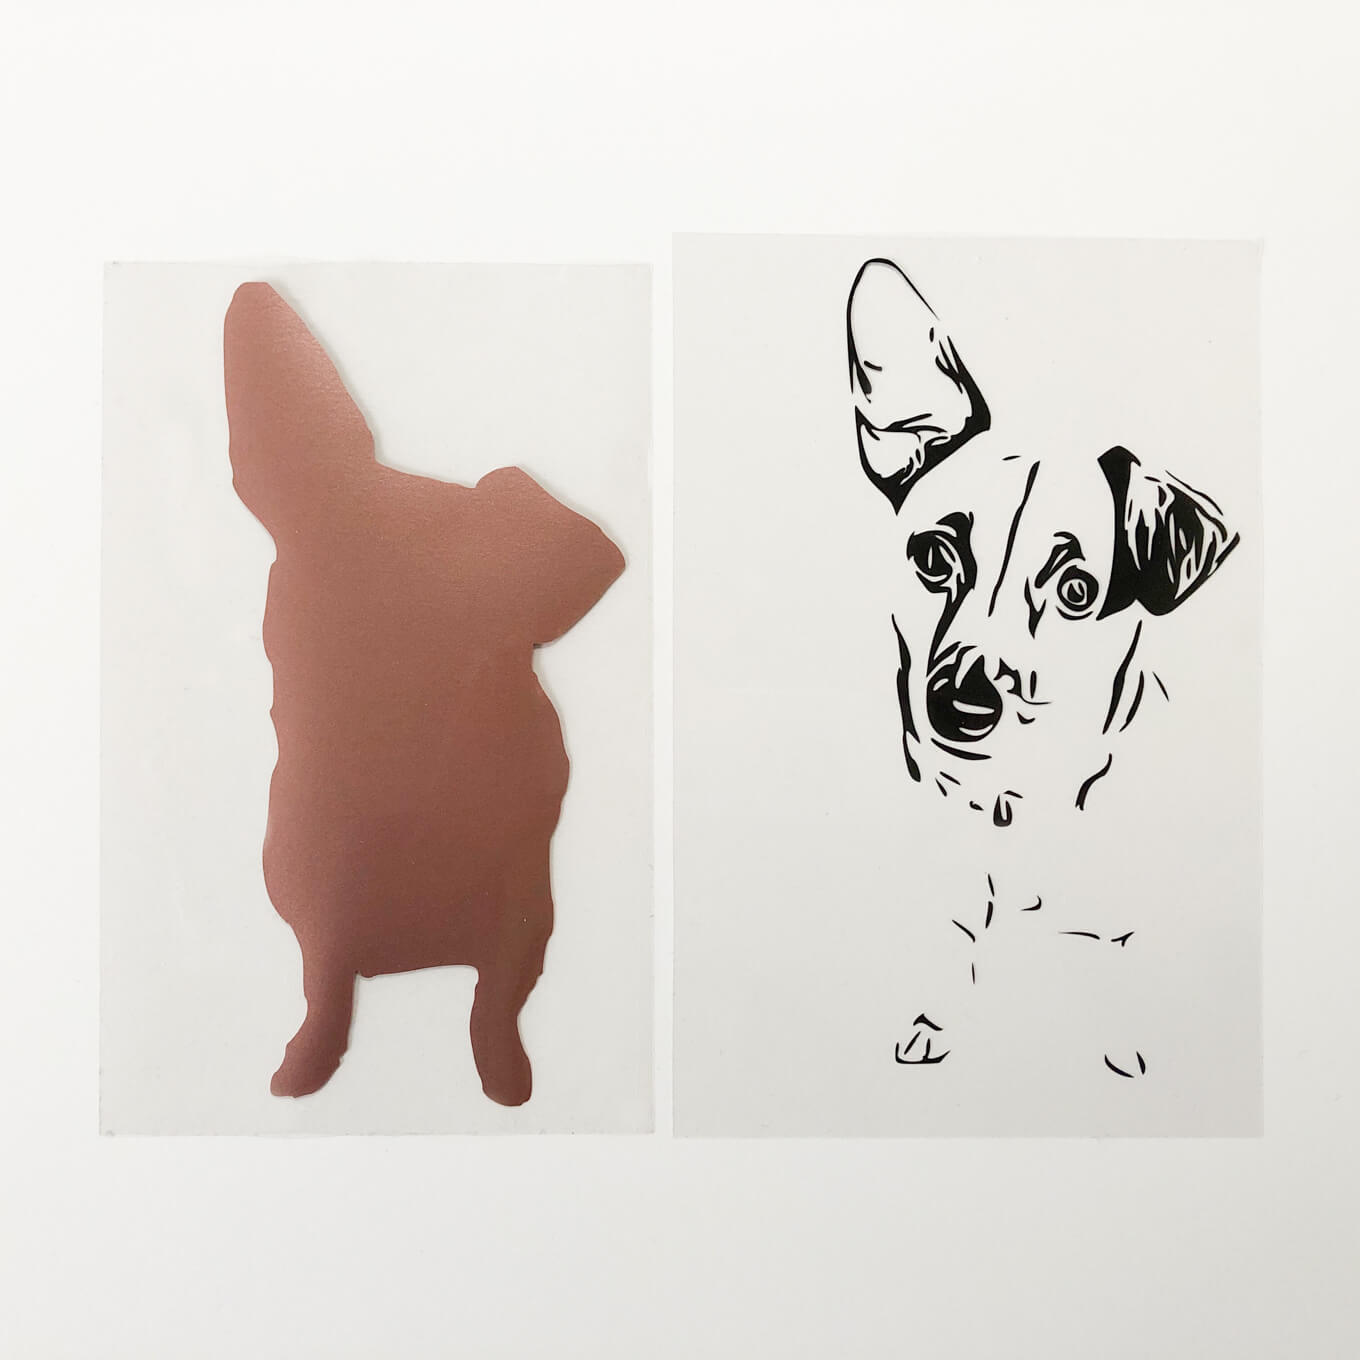
We uploaded a photo of Alfred to Cute Cutter to make an SVG cut file. Then we used our Cricut Maker to cut the SVG out of heat transfer vinyl (HTV). Lastly, we applied it to a blank canvas tote bag using the Cricut EasyPress.
In this tutorial, we’ll provide step-by-step instructions for making an HTV project with Cute Cutter, an online tool that can turn any photo into an SVG cut file that you can cut with your Cricut.
Materials
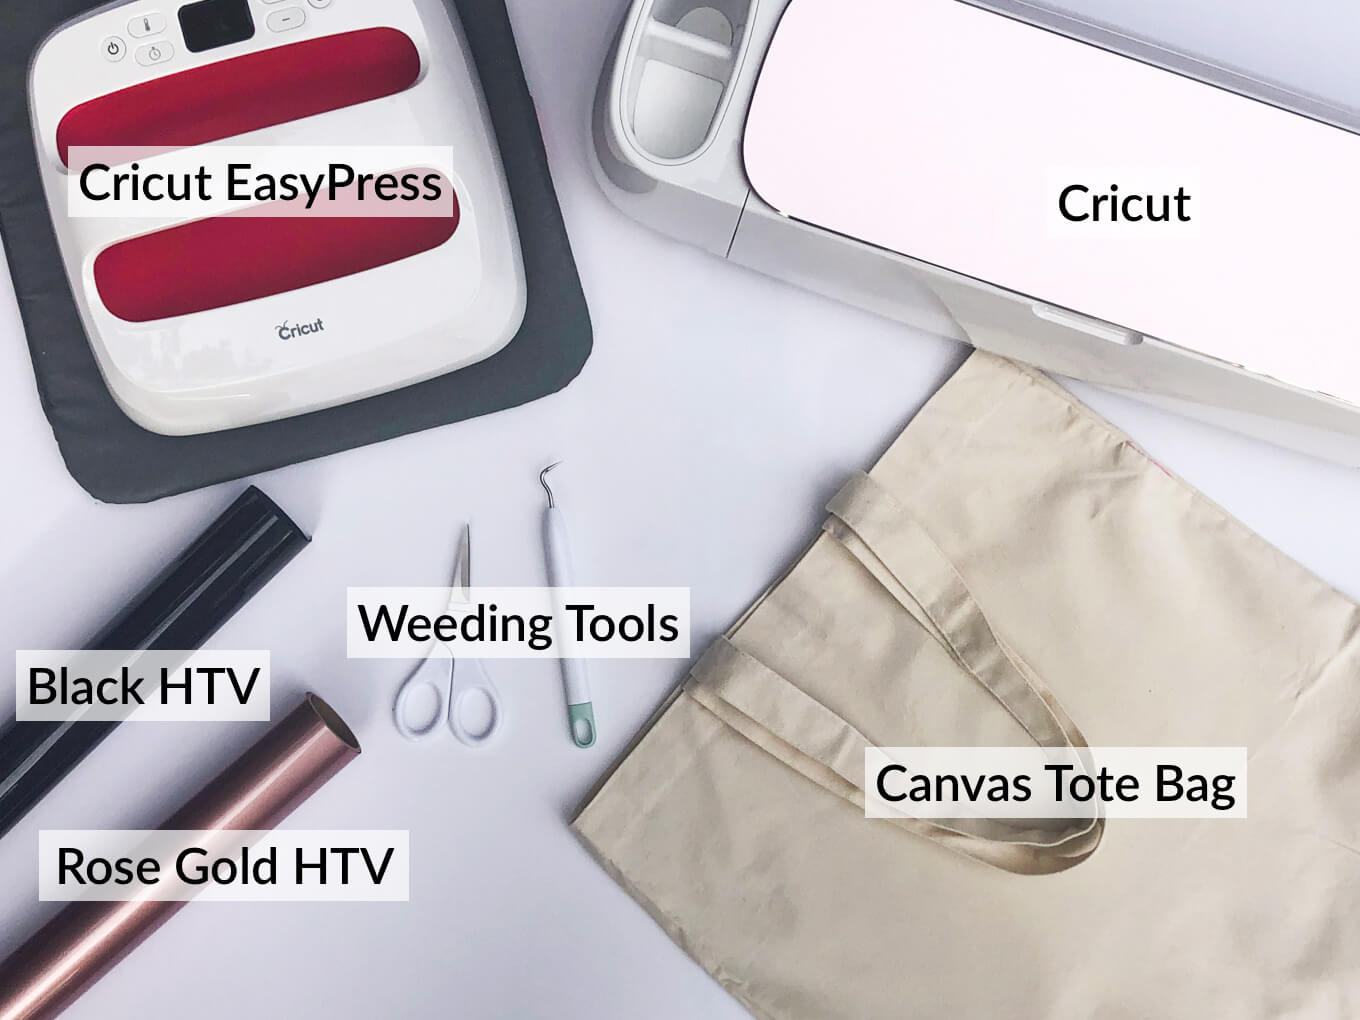
- Siser EasyWeed Electric Rose Gold HTV
- Siser EasyWeed Black HTV
- Blank canvas tote bag
- Weeding tools
- Laptop or desktop computer
- Cricut, Silhouette, or similar cutting machine
- Heat press. We recommend the Cricut EasyPress with the Cricut EasyPress Mat. You can also use an iron.
- A photo on your computer in one of these formats: .jpg, .jpeg, .png, or .gif
We ordered a few blank canvas tote bags off of Amazon and this one was our favorite. The handles are a good length (others were too short) and it’s nice and sturdy.
We love Siser EasyWeed HTV. It is super easy to weed, as the name suggests. It’s thin and you can layer it. Once you apply it with heat it sticks really well and the cover sheet comes off with no problems. Getting a good stick has been an issue for us using other brands.
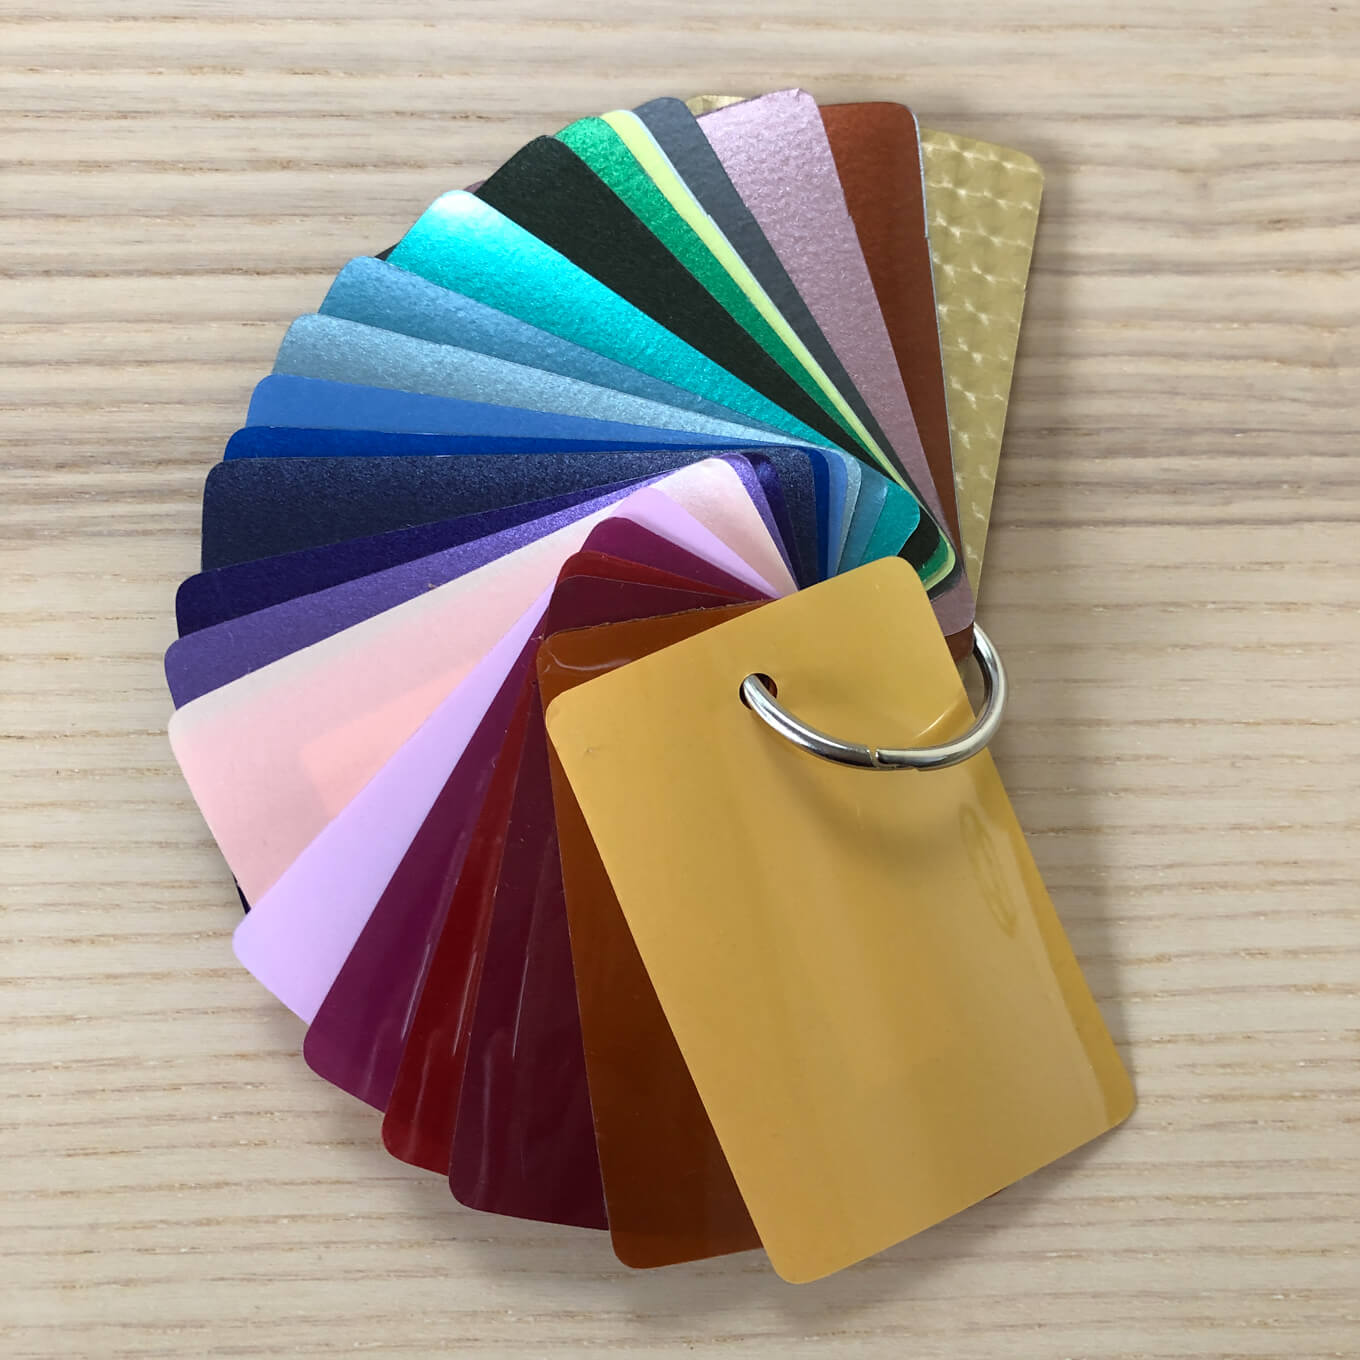
Siser’s “Electric” colors of EasyWeed have a subtle sheen that catches light very nicely. Electric Rose Gold is our favorite color and what we used for this project.
By the way, if you’re ordering from Expressions Vinyl we recommend grabbing their HTV sample packs so you can see all the colors in real life. Here are all the Electric colors:
We like using Cricut’s EasyPress for HTV projects because you can dial in an exact temperature and get a nice flat press. You can also use a normal clothes iron, but we’ve found it harder to get consistent results. We have the 9"x9" EasyPress, which didn’t fully cover our design, but it’s no problem — you can just apply the design with multiple presses.
Let’s get started!
Step 1: Upload Your Photo
Use Cute Cutter to turn your photo into an SVG cut file. The steps are the same as in our Vinyl Decal Tutorial. For your convenience, we’ve included these steps below:
Go to cutecutter.com/dashboard to start a new project.
Click the ‘Upload New Image’ button and navigate to the image file on your computer.
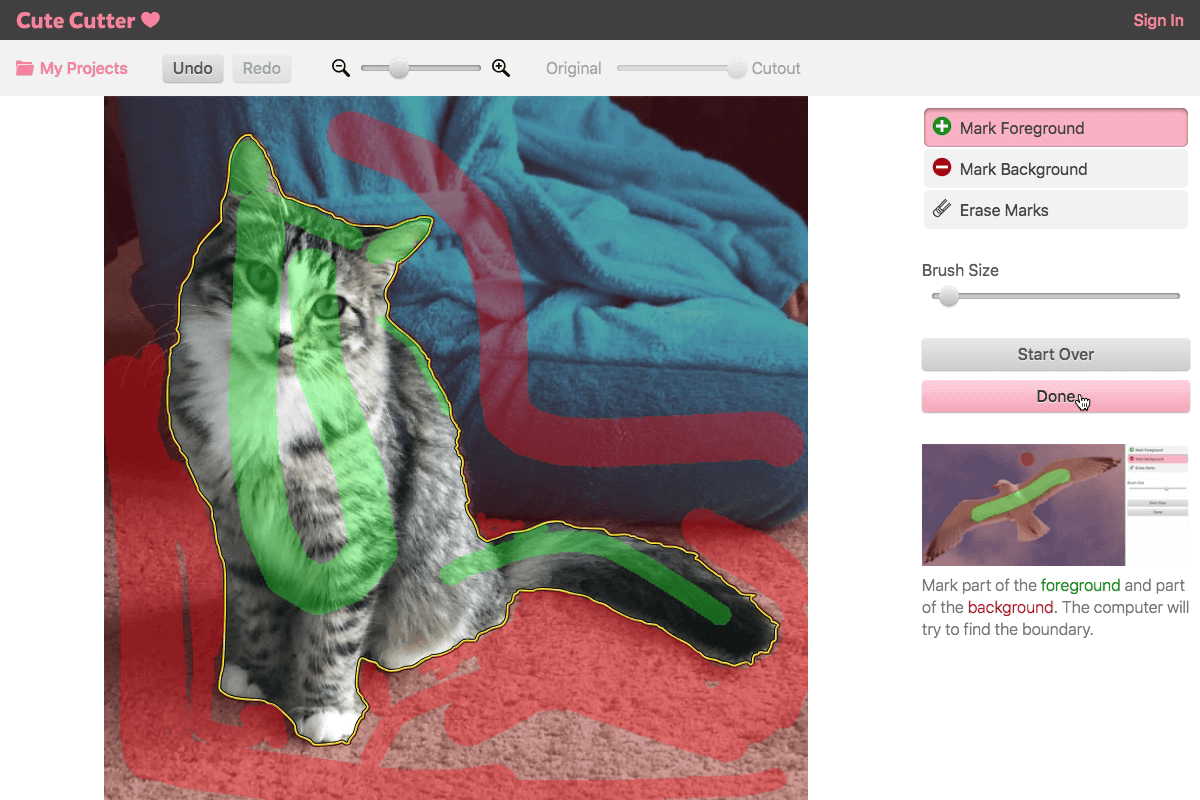
Step 2: Remove the Background
Once you’ve uploaded your image, it’s time to remove the background. Click the ‘Remove Background’ button.
Click the ‘Mark Foreground’ button and color the parts of your image that you would like to keep green by clicking and holding your mouse down and drawing over your subject. You don’t need to color the entire foreground. Just put some green marks to tell the computer that this is what you want to keep.
Then click the ‘Mark Background’ button and color the background parts of your photo red by clicking and holding your mouse down and moving it over the background.
Once you have some of the foreground and background colored you should see a yellow dividing line appear. Whatever is on the outside of this line represents what will be removed from the image. It may take a second for the line to update its position once you add a new mark so take your time with it.
Use the ‘Brush Size’ slider to make your brush smaller for more detailed strokes or larger for larger strokes. You can also zoom in and out using the slider in the top toolbar.
Click the ‘Done’ button whenever you are reasonably happy with your result. Don’t worry you can always go back to this step to tweak things.
Step 3: Adjust Image Settings
Once you’ve removed your background, there will be three layers.
- The black layer which shows the shadows and darker parts of your image.
- The white layer behind it which shows highlights and lighter parts of the image.
- The pink layer in the back which is to help you visualize how the image will look when placed onto a contrasting background. In this case, it can help us see how the decal might look once it’s stuck to something.
Now you will use adjustment tools on the right to turn your image into a work of art that you can cut on your cutting machine.
There are four settings: Blur, Edge Contrast, Threshold, and Remove Speckles. You’ll want to experiment with all these settings to get the image you want.
Blur
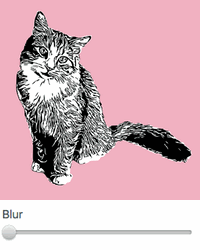
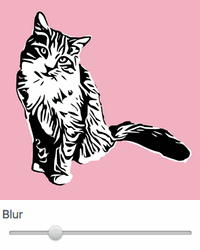
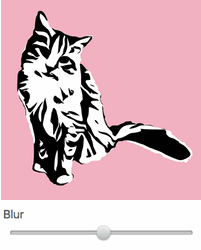
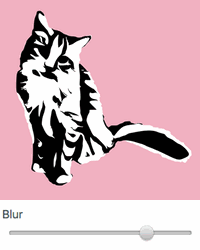
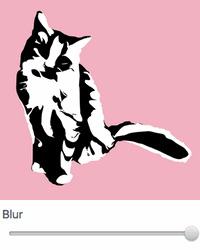
Blur controls the amount of detail. With no blur, you can see all the fine detail of the original image and as you increase blur those details get blurred out and the image becomes more abstract. Generally we like to start blur low and then bring it higher while still making sure our subject is recognizable.
Edge Contrast
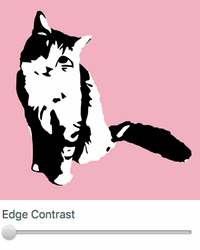
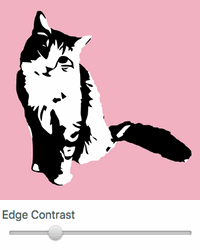
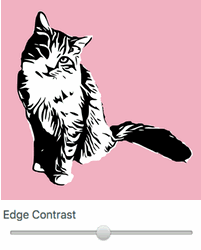

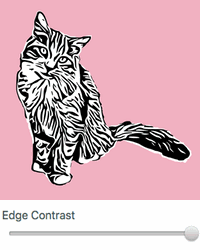
Edge contrast will emphasize where dark regions and light regions meet. It works great where you want to emphasize texture, like fur or hair. But keep in mind that for human faces, edges mean wrinkles! So for human faces we like to keep edge contrast low (but high enough to bring out the eyes, nose, and mouth). For furry friends, we’ll experiment with higher edge contrast depending on how much we want to bring out the fur texture.
Threshold
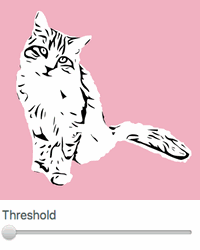
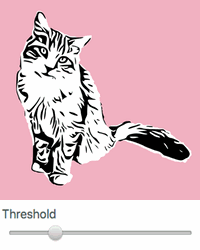
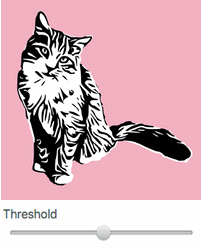
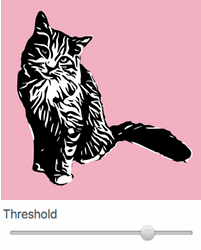
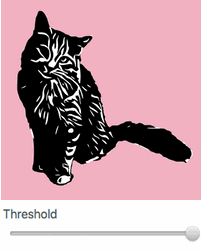
Threshold controls the balance of black and white in your image. The threshold is the cutoff point where the computer determines what is a shadow (black) and what is a highlight (white). We usually adjust Threshold to find the perfect balance point, then we’ll go back to tweak Blur and Edge Contrast again.
Remove Speckles
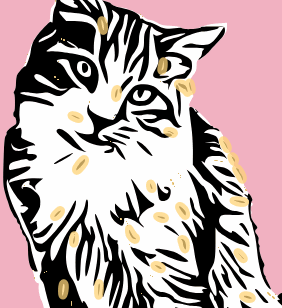
This setting removes little speckles (white or black) from the cutout. The setting controls how big a region should be in order to count as a “speckle”. Since speckles are annoying to weed and don’t contribute much to the overall impact of the design, we’ll usually turn this up high so long as we’re not losing any important details.
Tip: If Remove Speckles is too high you might lose an important “speckle”, like an eye! If you can’t figure out why your eyes are getting lost, make sure to turn Remove Speckles down. We like to keep it down while playing with the other settings, then bring it up as the finishing touch.
Step 4: Download the SVG
When you’re done tweaking the image settings, you’re ready to download your design as an SVG and cut it out with your Cricut!

Click the ‘Download’ button in the lower right. You should find your SVG file in your ‘Downloads’ folder on your computer.
Step 5: Cut HTV Layers in Cricut Design Space
Go to design.cricut.com and click the ‘New Project’ button.
Click the ‘Upload’ button on the left side of the screen.
Click the ‘Browse’ button and navigate to your downloaded SVG. You should find the SVG from Cute Cutter in your ‘Downloads’ folder.
Click ‘Save’.
Click on the thumbnail of your image and click ‘Insert Images’ in the lower right corner.
We don’t need the pink background so in the layers panel on the right select the pink background layer and then hit the ‘Backspace’ or ‘Delete’ key to delete it.
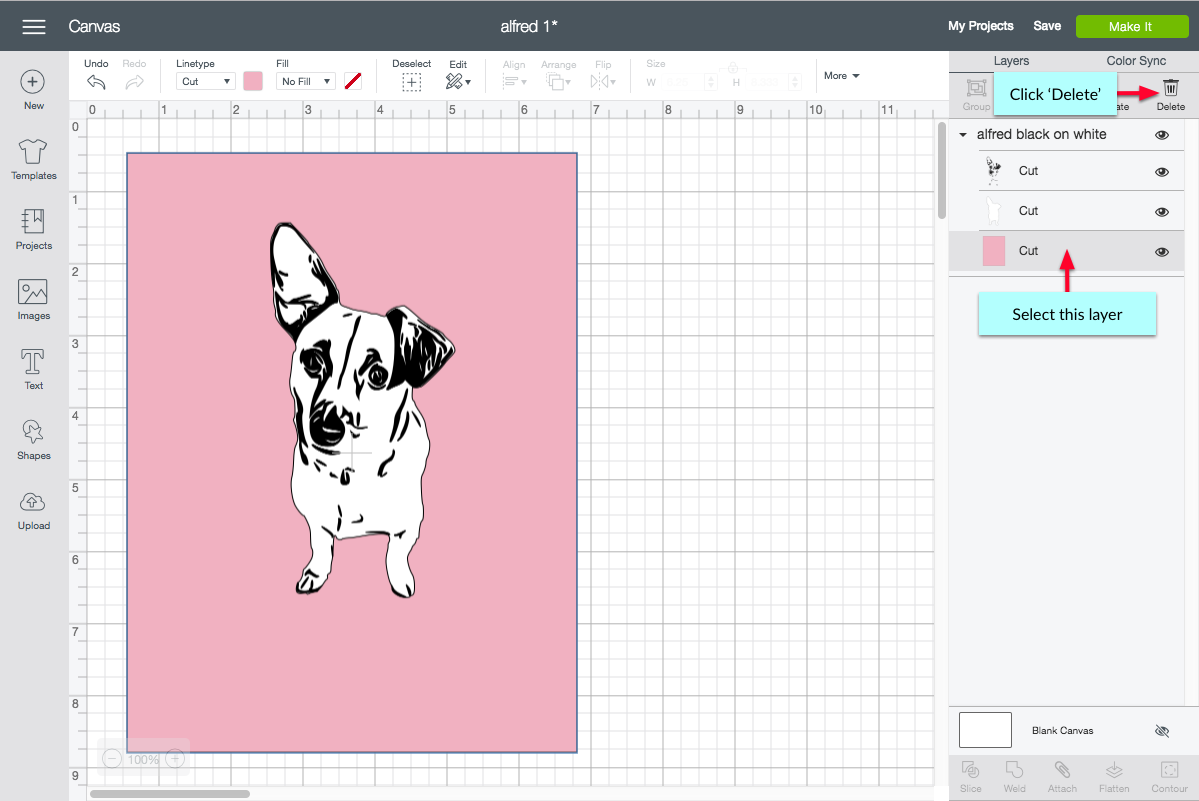
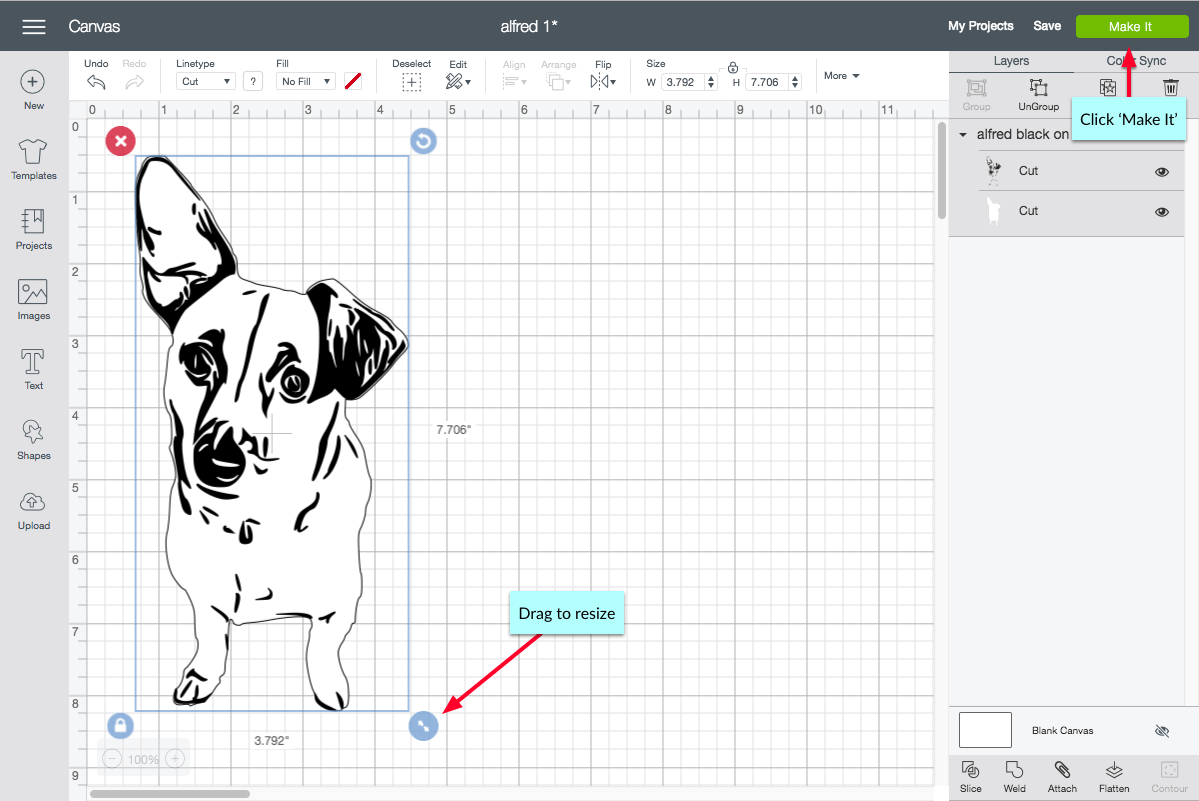
Click on your image and scale it to size with the handle in the lower right corner of the image. Check that the width and height will work for your application.
When you’re ready click the ‘Make It’ in the top right corner.
Turn on ‘Mirror’ for each layer. Don’t forget this or your design will be reversed! Then click ‘Continue’ in the bottom right corner.
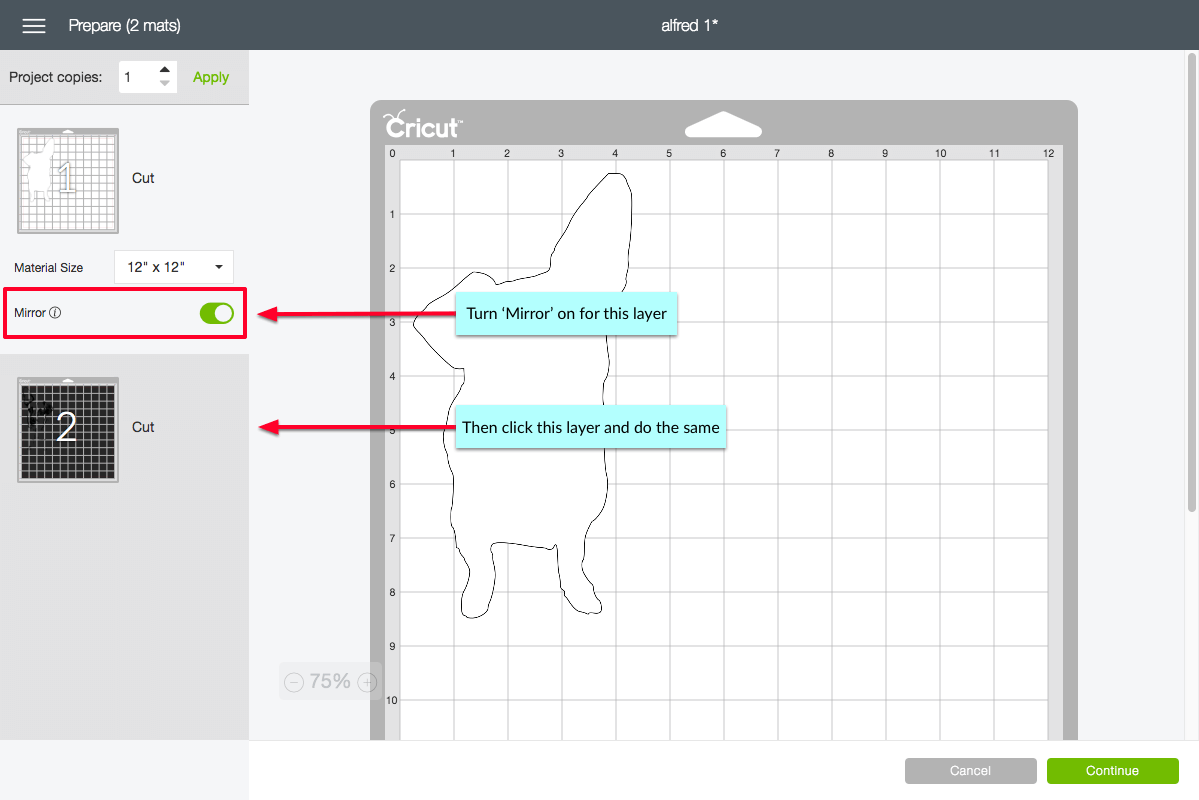
Load your HTV shiny side down.
Use the ‘Iron-on’ setting for Siser EasyWeed. Follow the prompts on the screen to cut your two HTV layers.
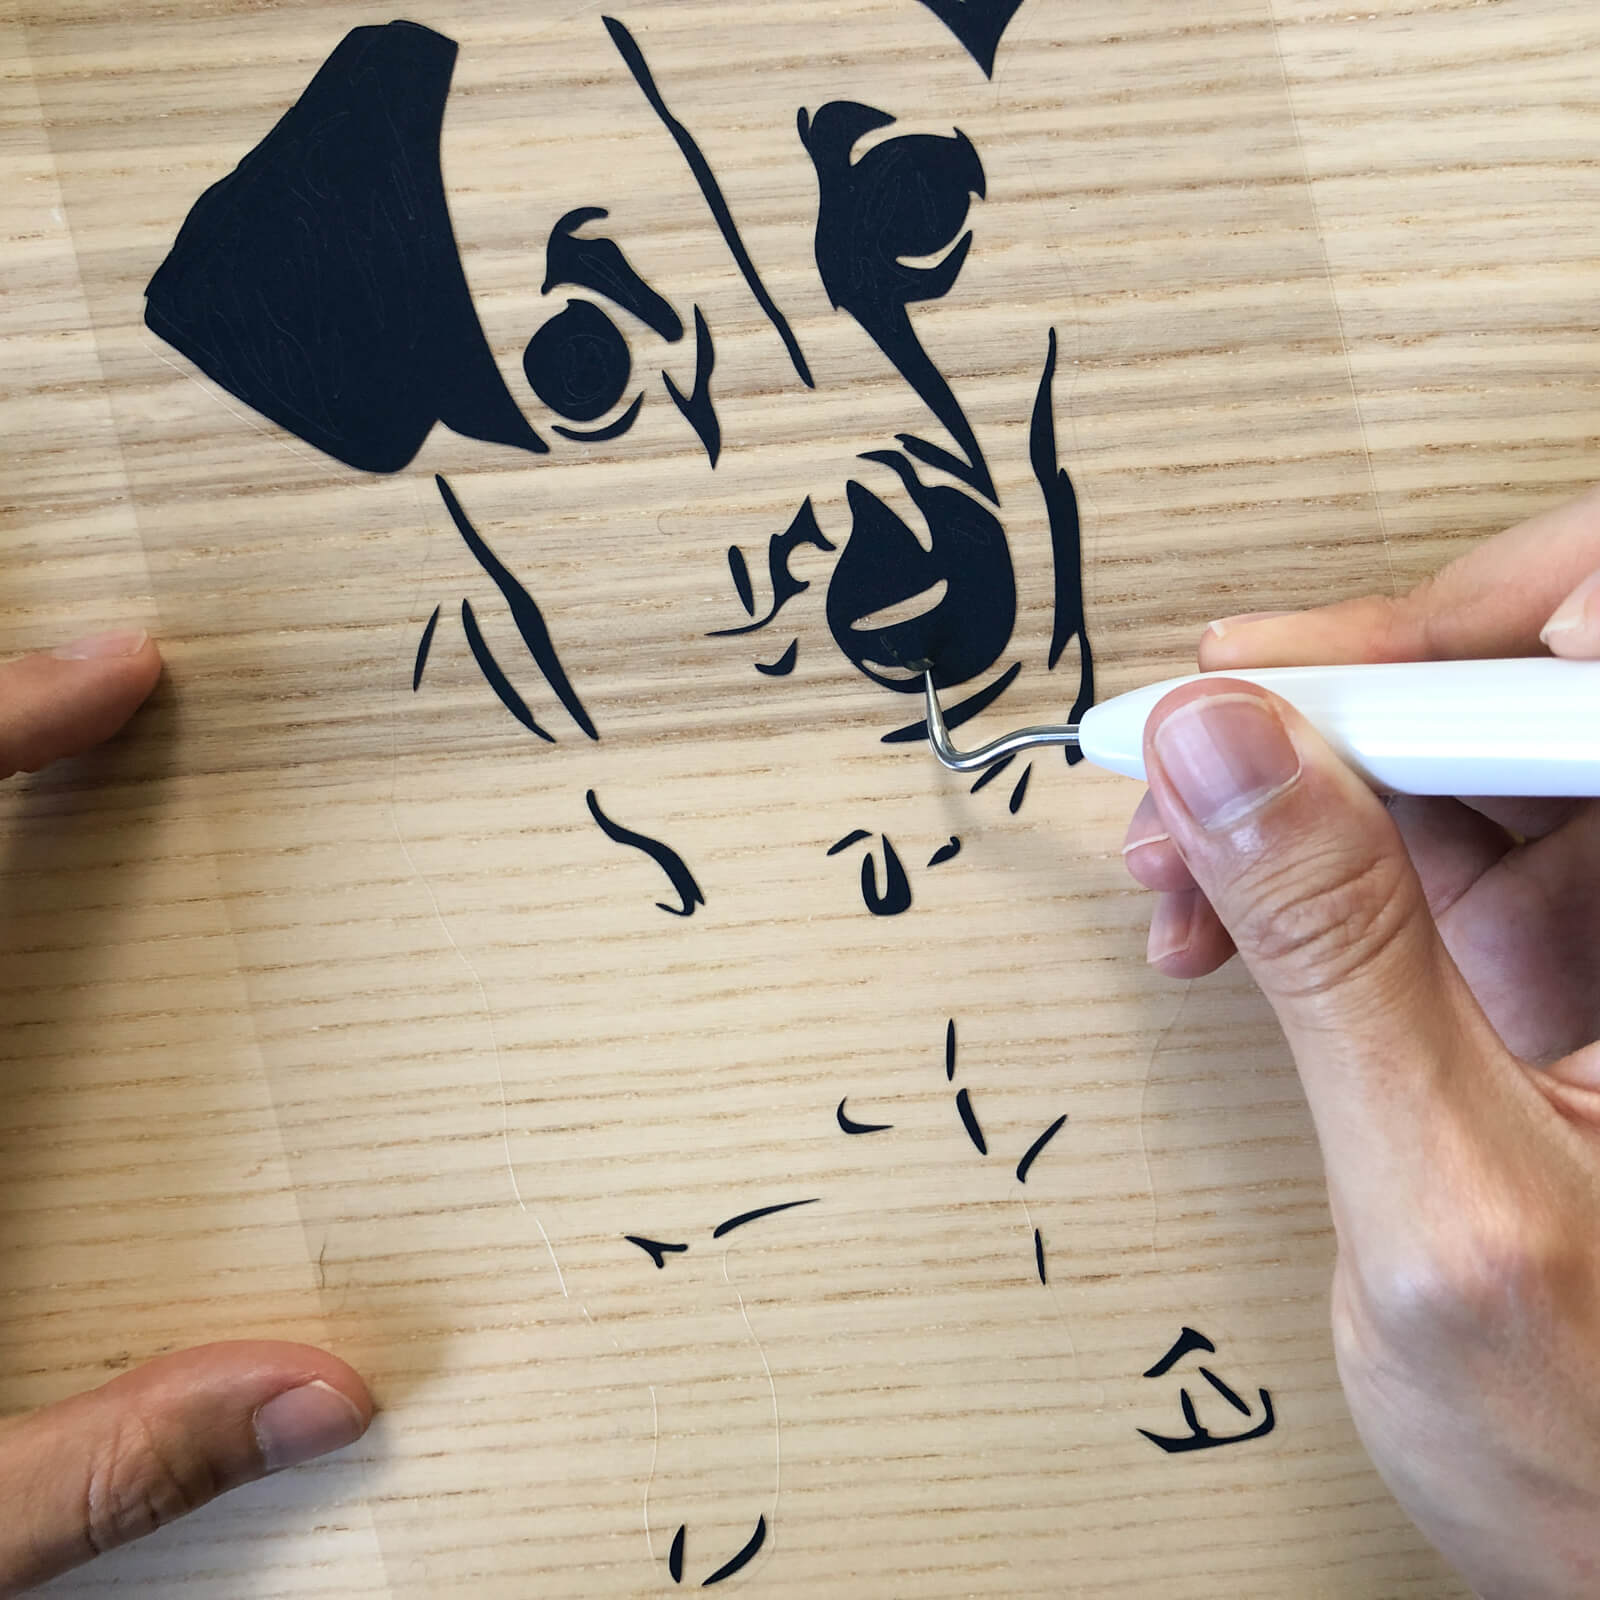
Step 6: Weed Your HTV Layers
Next you need to weed your excess HTV (everything that’s not your design) from the clear carrier sheet.
Start by trimming down your HTV with scissors. You can save your scraps for another project.
Start your weeding by digging your weeding tool into a corner. Pull up and you’ll break the seal between the HTV and the carrier sheet. Carefully peel away the excess HTV around your design.
You’ll also need to weed out any holes in your design.
Double check that you haven’t left anything in that shouldn’t be there.
Step 7: Apply HTV to Tote Bag
We like to pre-shrink the tote bag by running it in the dryer on high for 15 minutes. We do this even if a bag is marketed as “pre-shrunk”.
The key to layering HTV is to not “overcook” the bottom layer. If you pressed each layer for 15 seconds, the bottom layer would receive 30 seconds of heat. Too much heat can cause HTV to dry out, resulting in cracking or poor adhesion.
Instead you should “tack” the bottom layer for just a few seconds. This will get it to stick to the bag enough so that you can peel the carrier. Then you can press the top layer for the full time. Siser has more tips on layering HTV in this blog post.
The following instructions are for EasyWeed. Other types of HTV may have different recommended temperature settings and press times. Here are links for your reference:
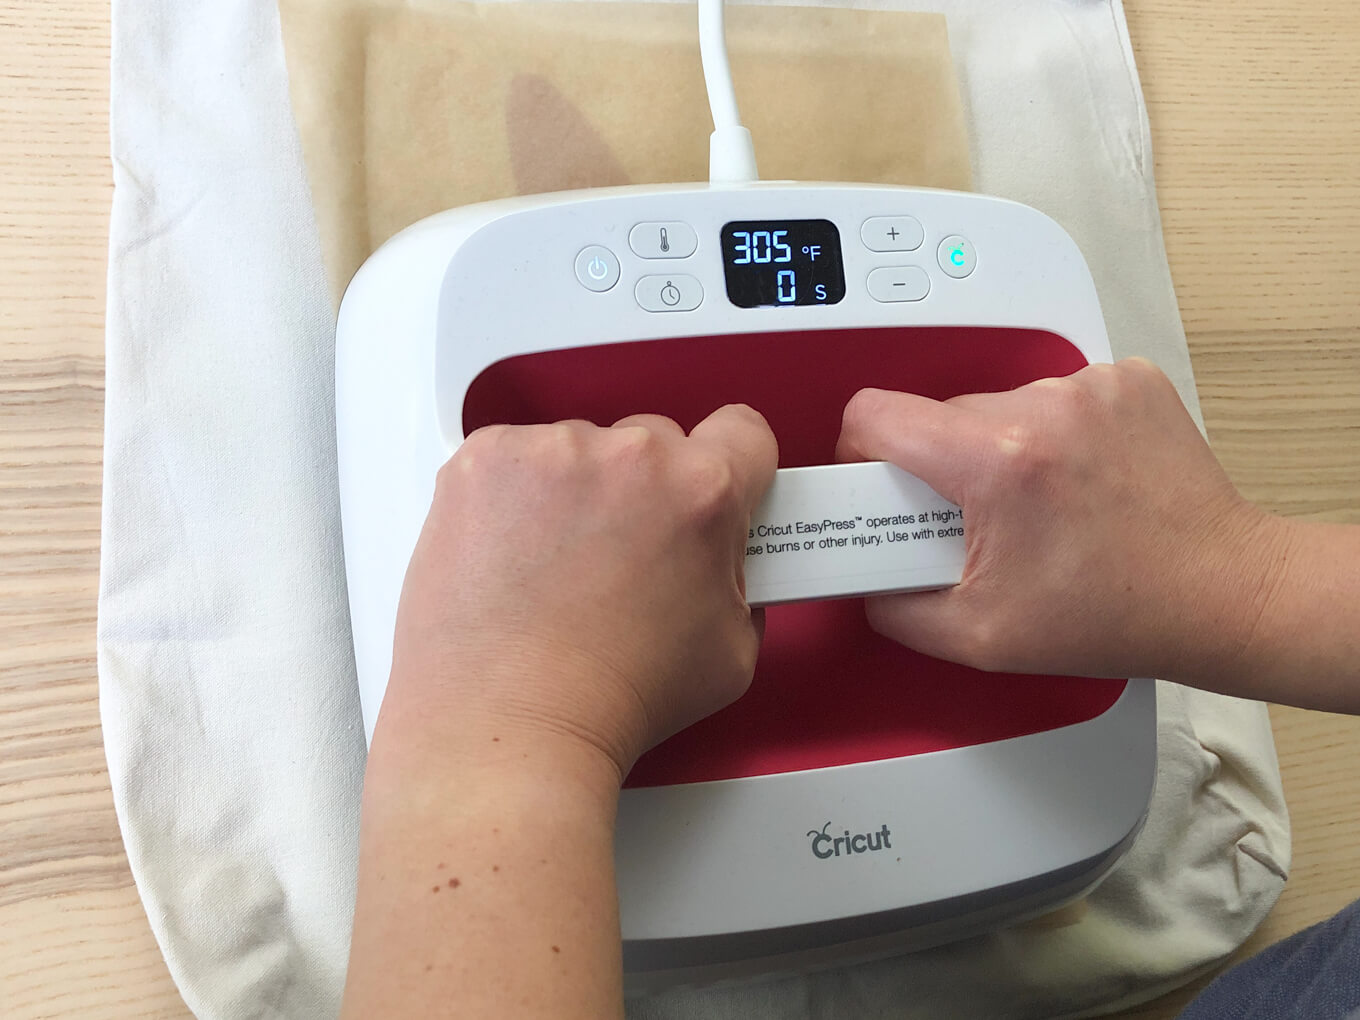
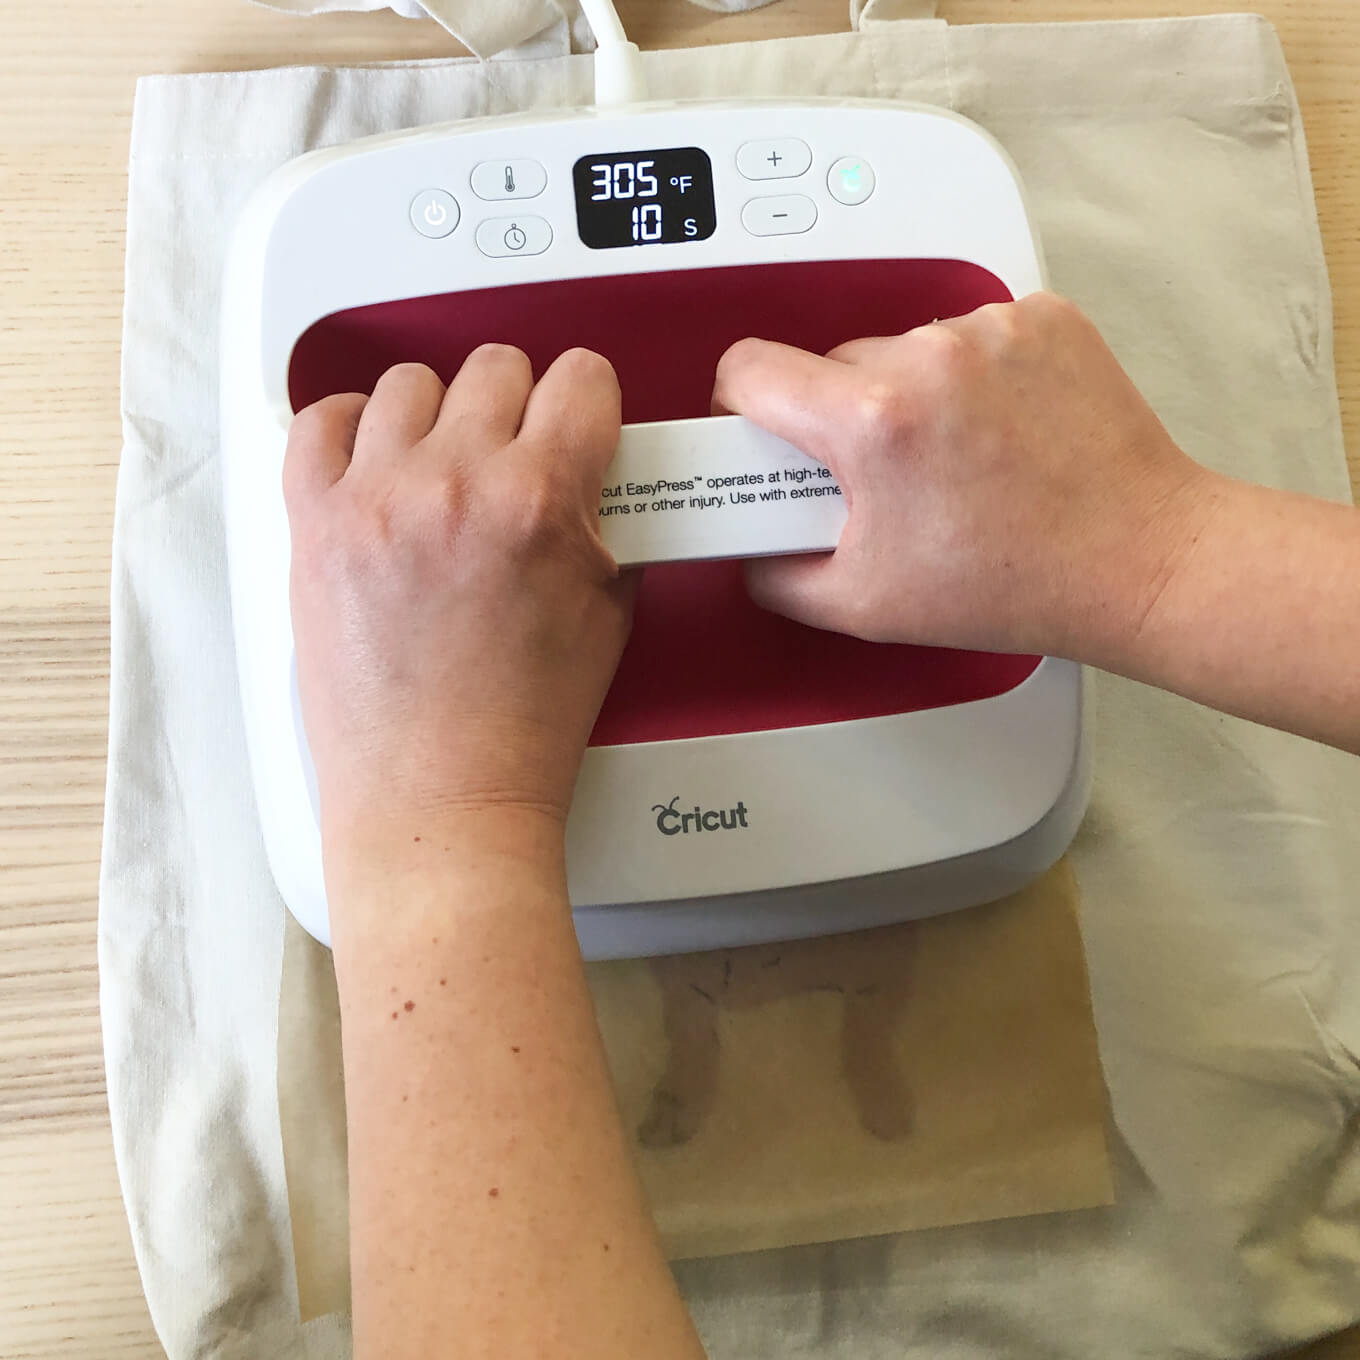
Set your heat press for 305°F.
Lay your tote bag flat on your Cricut EasyPress Mat. If you don’t have an EasyPress Mat, make sure to use a hard, flat surface. Don’t use an ironing board — it’s too squishy. Instead use a folded towel on a table as your base.
Preheat your tote bag for 3 seconds.
Lay the bottom (pink) layer on the bag. You can use the bag’s handles as a reference for centering.
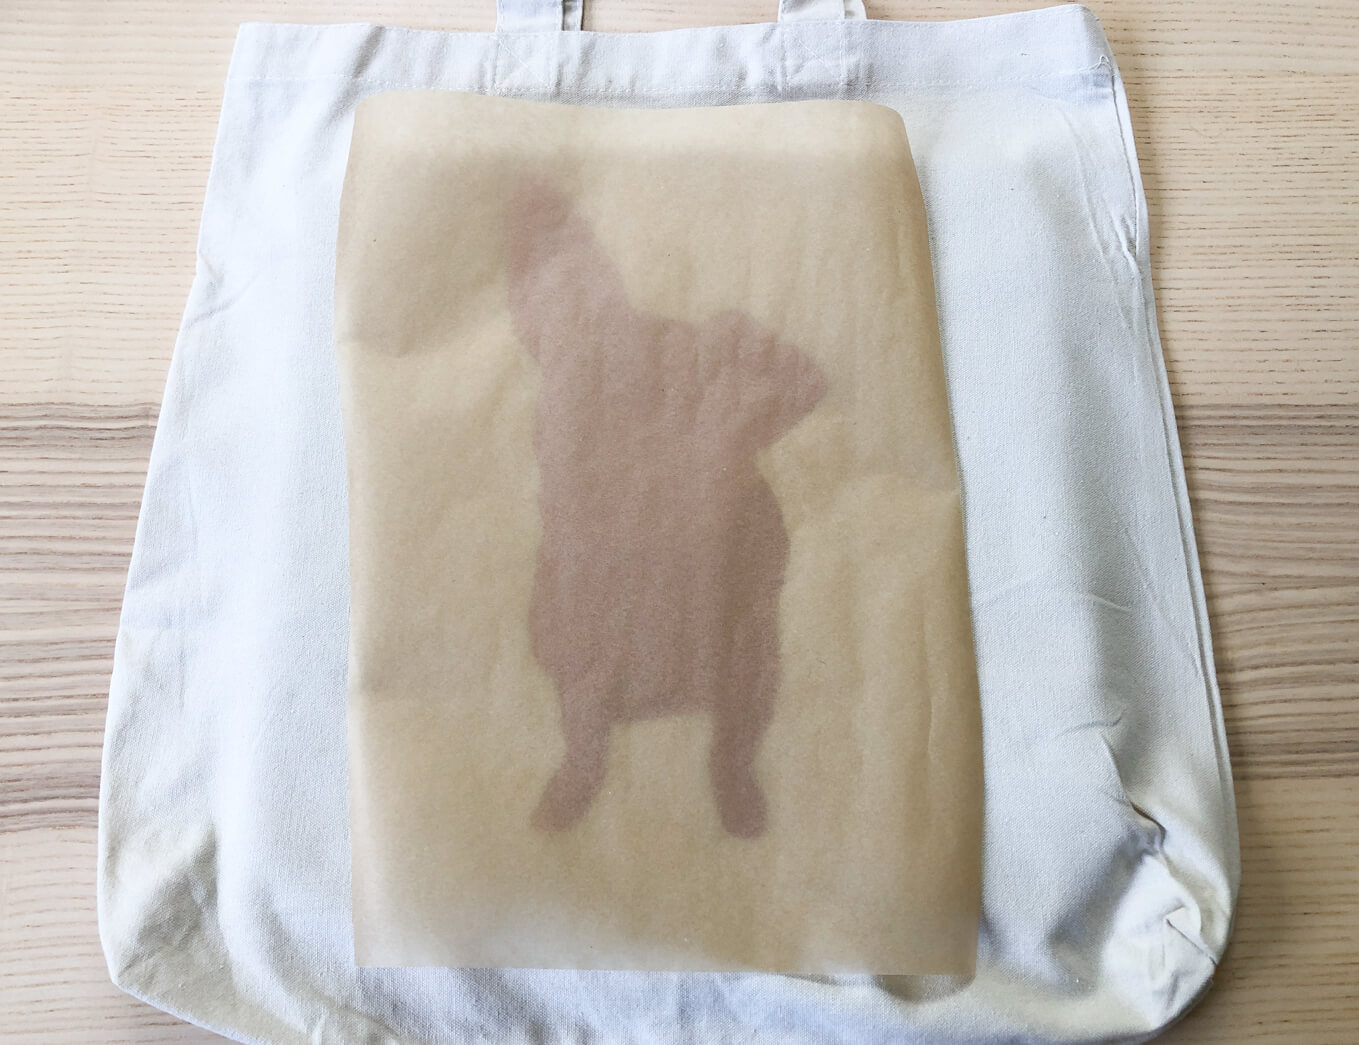
Place a cover sheet over the HTV to protect it. We use parchment paper.
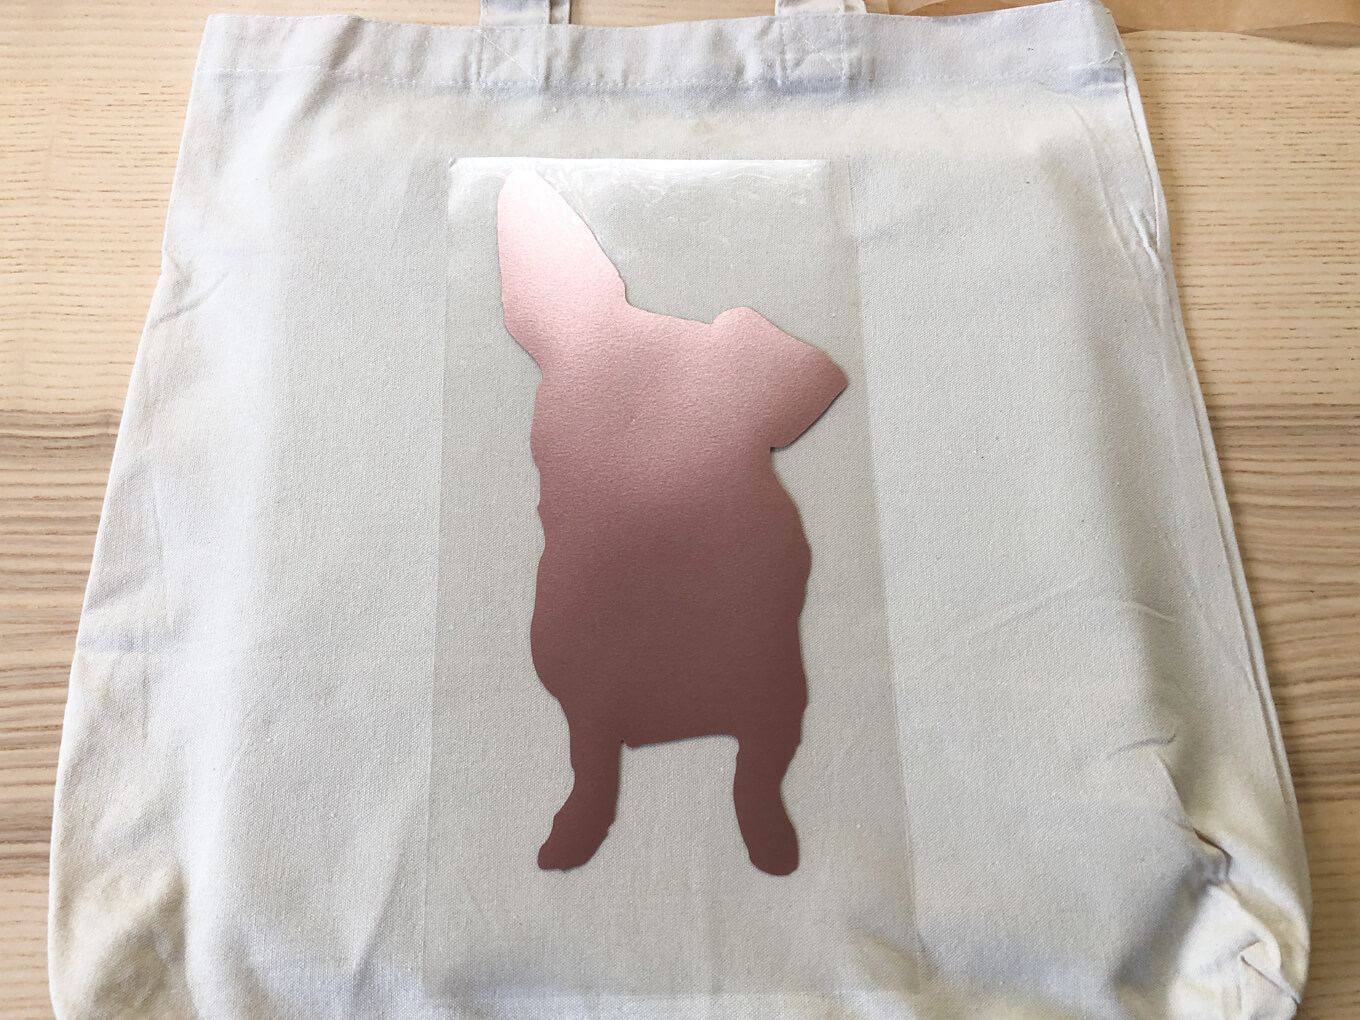
Press firmly for 2 seconds. Our EasyPress is only 9"x9", so it wasn’t big enough to cover our whole design. So we pressed the top part for 2 seconds, then the bottom part for 2 seconds. When working with the EasyPress or any iron, keep in mind that the center will be the right temperature but near the edges it will be cooler.
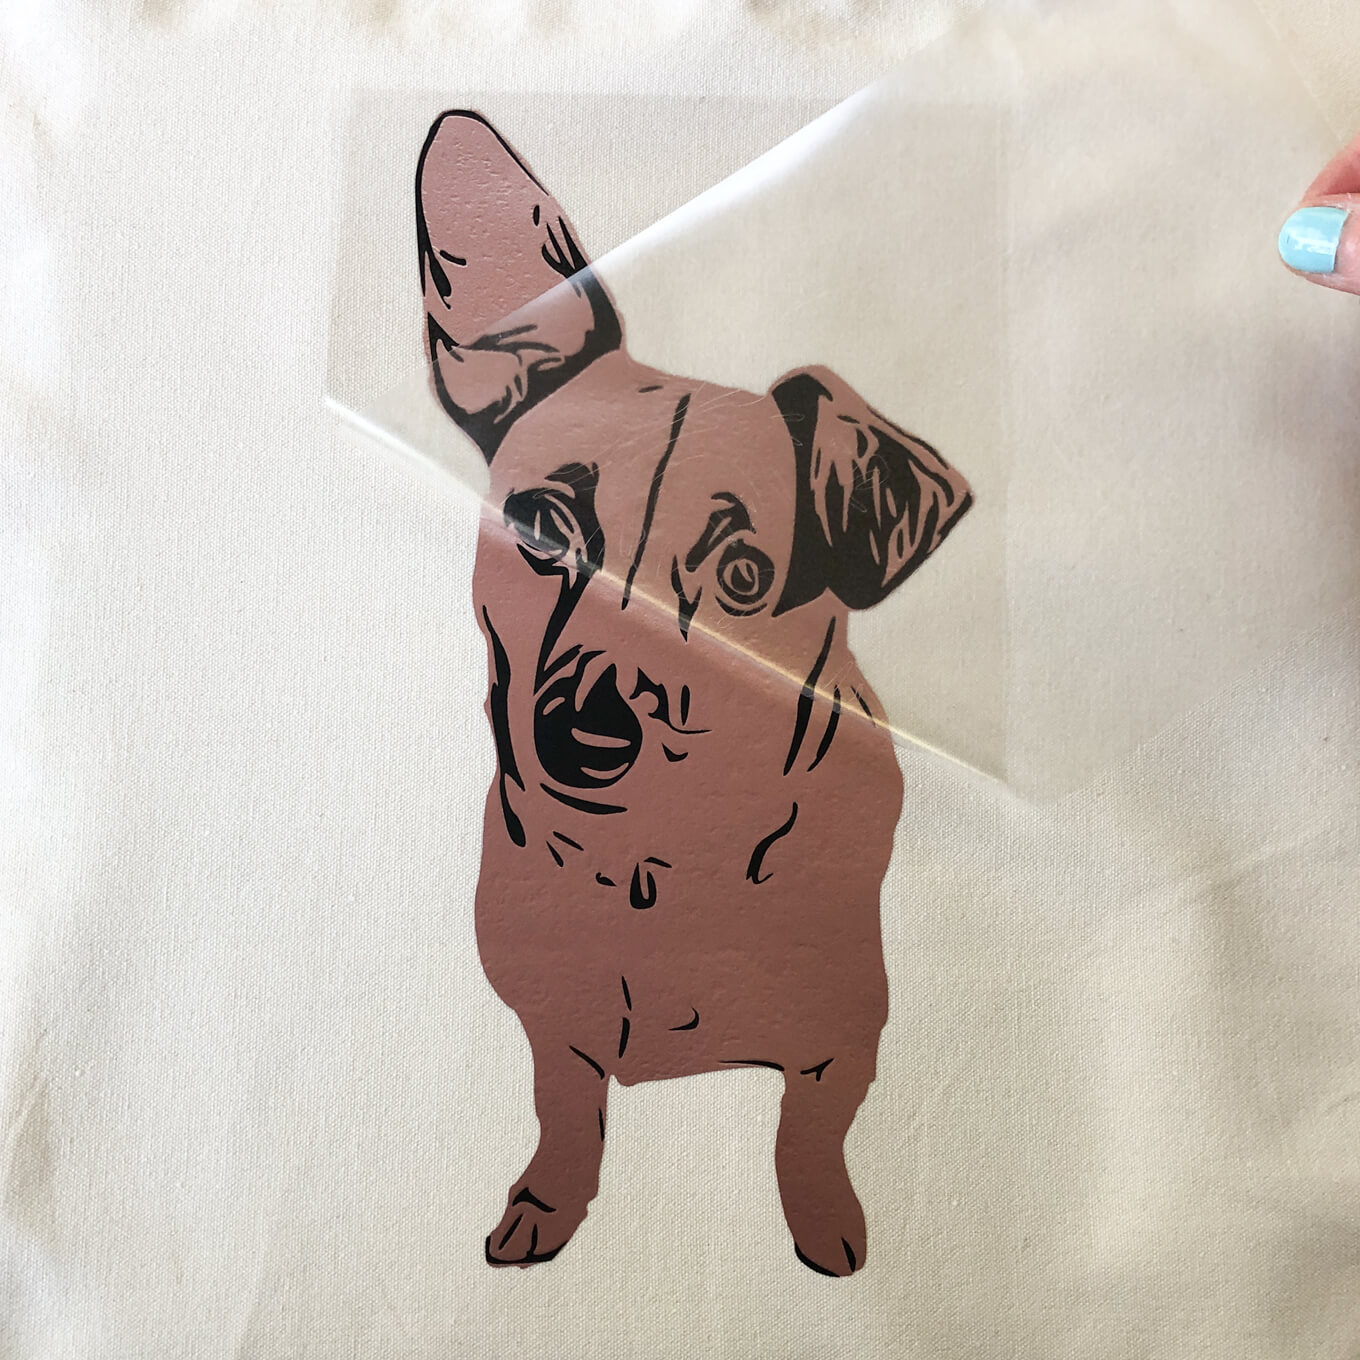
Peel the carrier sheet hot. (As soon as its cool enough to handle — don’t burn yourself!)
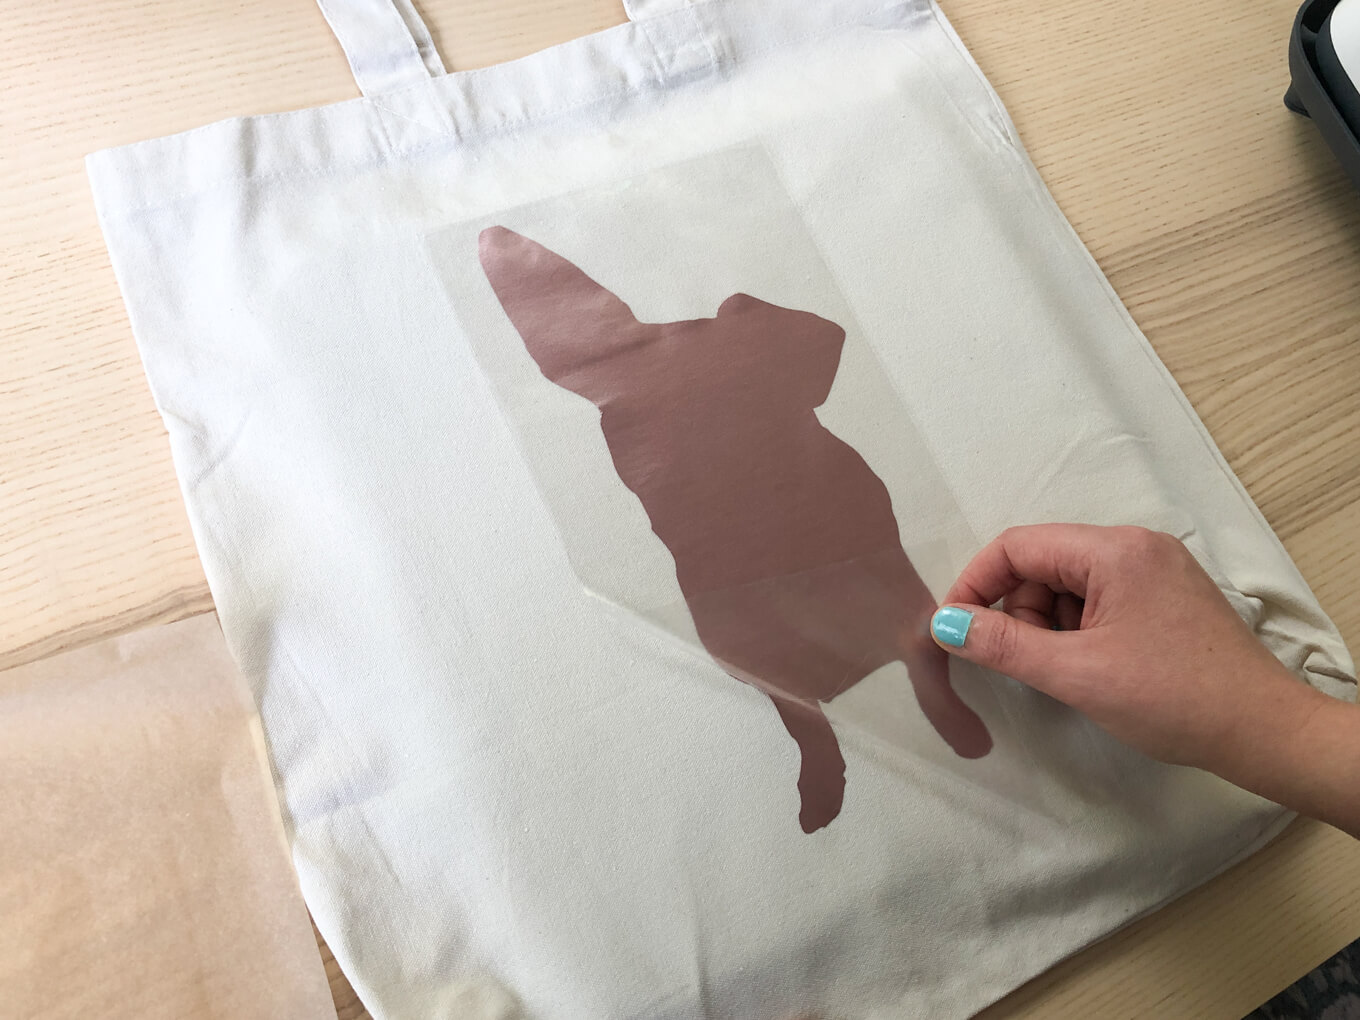
Great! The bottom layer is tacked!
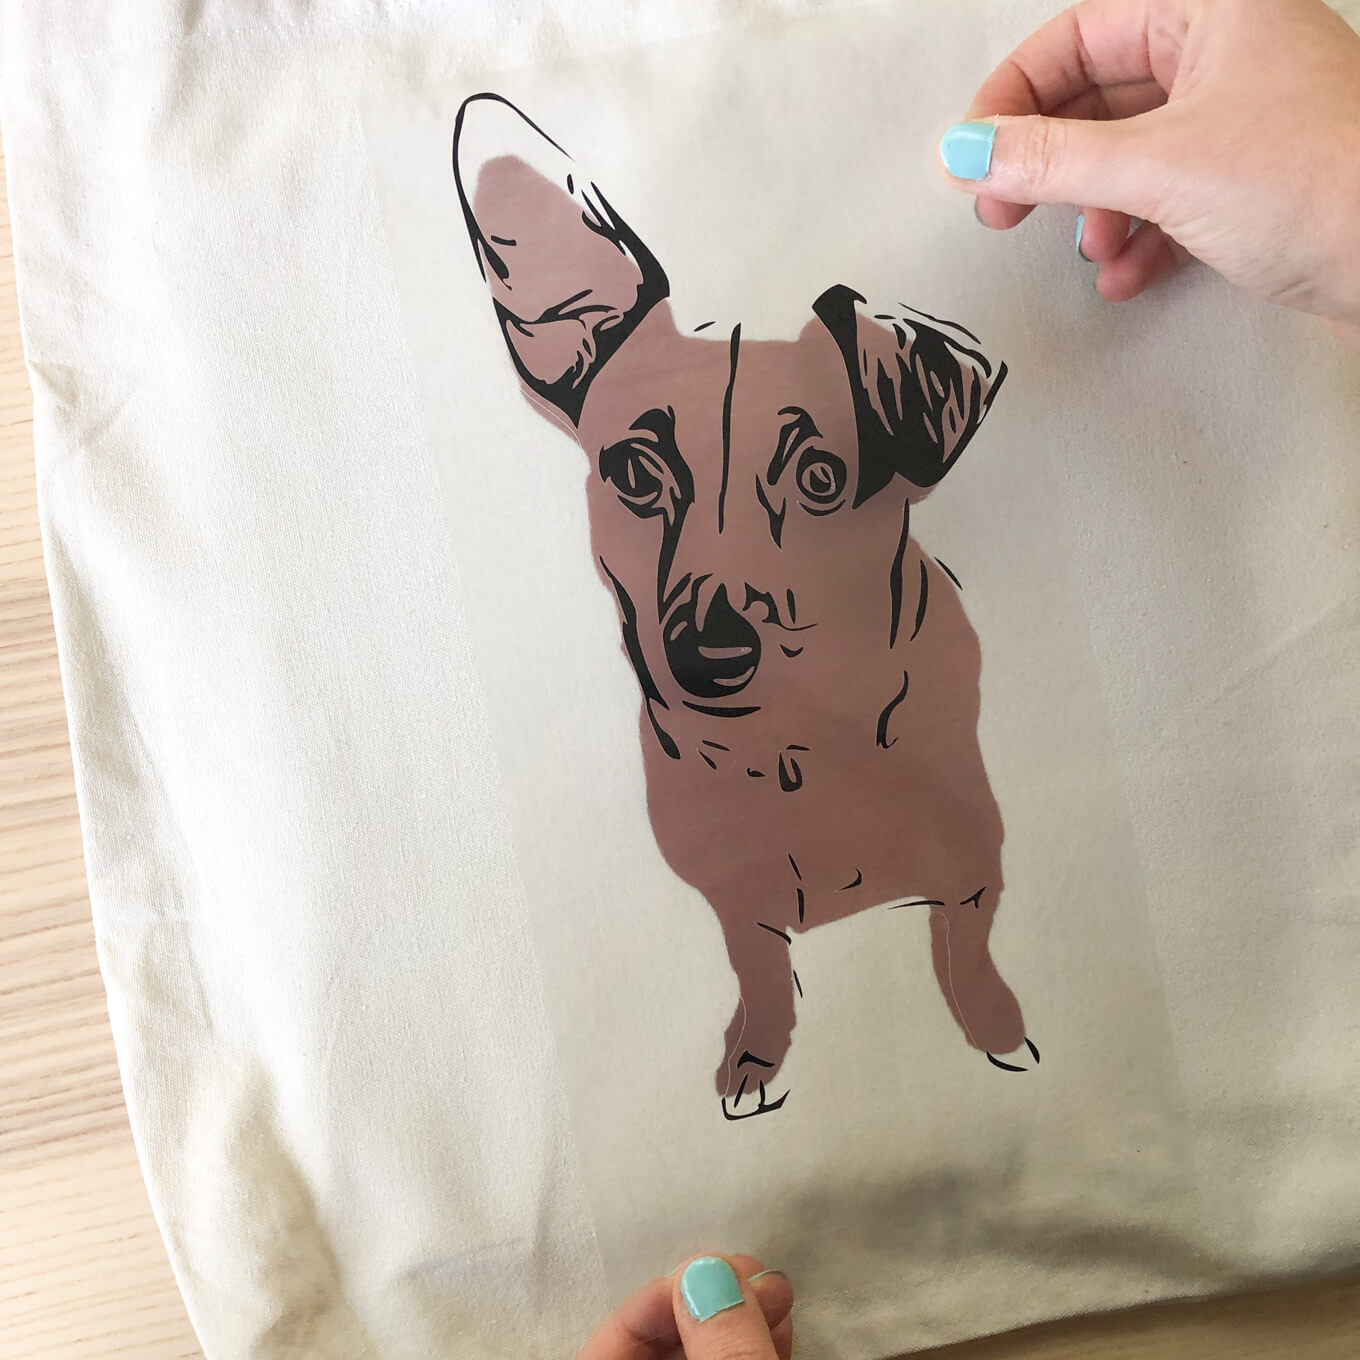
Now carefully align the black layer and place it on top.
Place your protective cover sheet over it.

Press firmly for 10 seconds. Again, we had to do two separate presses to heat our whole design.
Peel the carrier sheet and voila, you’re done! 🎉